


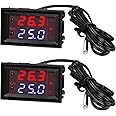
12V Electronic Temperature Controller Programmable -50 to 110 Degree Celsius Heating/Cooling Thermostat Control Switch Module NTC Waterproof Sensor Probe Dual Color LED Display Monitor (2 Pieces)
Details
- Colormulticolored
- BrandWeewooday
- Voltage12 Volts
- Product Dimensions1.89"L x x
- Display TypeLED
Description
🌟 Control Your Climate, Elevate Your Space!
- COMPACT DESIGN - Space-saving module size of 48 x 29 x 32 mm fits seamlessly into any setup.
- PRECISION CONTROL - Achieve pinpoint accuracy with a control precision of 0.1°C.
- DUAL COLOR DISPLAY - Monitor your environment effortlessly with a dual color LED display showing both measured and set temperatures.
- RELIABLE PERFORMANCE - Tested for consistency, ensuring dependable temperature management every time.
- VERSATILE APPLICATIONS - Perfect for smart homes, aquariums, and industrial equipment—control heating or cooling as needed.
The 12V Electronic Temperature Controller is a programmable thermostat that operates within a temperature range of -50 to 110°C. It features a waterproof NTC sensor, dual color LED display, and boasts a refresh rate of 0.5 seconds, making it ideal for various applications from home automation to industrial use.


Have a Question? See What Others Asked
Reviews
D**E
Small for a great temperature sensor
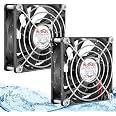
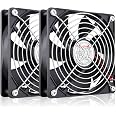
Just use the default option, these are very accurate, change the settings is tricky because of how small they are, but I find the default option to be fine. They work to control a small relay and no problem with the connection. Just follow the instructions. Used to turn a 12vdc fan on when the temperature probe sensor is 2° above the set point. Works great.
I**E
Good Little on-off Temperature Controller
This unit is a good little temperature controller. Some things to know:1. Screw contacts are not labeled. Relay terminals will measure open (infinite resistance) both polarities. Module power input measures 15 Meg ohm when red multimeter lead is on positive, infinite resistance when leads reversed (series diode protedtion).2. Module requires minimum 8 volts to actuate the relay.3. Relay is rated for 10 amps AC. DC rating is generally less for a relay.4. Module default usage is for cooling. To set for heating:a. Hold top button in for 5 seconds, this gets you to P0 - P9 parameter settings.b. Use top and bottom buttons to get to P0.c. Hold the top button in, then push bottom button in for a short amount of time. Then let go of both buttons.d. When the parameter value flashes, use the top and bottom buttons to change value.5. The temperature difference value, P1, (hysterisis) can be changed by same method above.
S**2
functional with 12 vdc
programming and wiring was slightly a challenge . but it works.
K**N
Yep. didn't work.
No wiring instructions included. Had to look at the original Amazon add to verify. Parameters were easy to figure out even without instructions. Hooked up to what would be considered a 6" computer type fan to assist in venting an enclosed area. It didn't work at all. Ended up wiring the fan direct. I am sure the fan will prematurely wear out. Looking for an alternative or another product.
J**R
Affordable, useful thermostat
This item I have used in 2 applications. As an electronics cabinet temperature monitor/switch where it switches on fans when temperature rises above 80 ° Farenheit. It switches off at 84.8 ° F reliably. The other application is freeze protection 32 ° energizes pipe tape heaters and heat pads. The digital readout is bright and easy to read up to 10 ft away. There are several wiring options that can be found online by searching product and exact model#. I used a direct 12 V dedicated positive lead, and negative lead. Jumpered the 3rd and 4th terminals to secondary negative lead which I also incorporated a manual switch, so I can isolate it if I need to. For mounting I used sheet metal in one app, and plastic in another. Traced the outline with sharpie then carefully cut inside the line with shears and jigsaw respectively. Its an affordable useful item, been using for a month now.
M**K
Here are your directions and everything else you need to know
Directions for use:Red - Measured TemperatureBlue - Set TemperatureSingle press Set enables setting the temperature to trigger (enable relay).Press and hold the Set button for 3 seconds to enable setting the parameters, P0-P8Once you are in Parameter mode, use the Set (top) and C/F (bottom) buttons to move up or down through the settings.When you want to change a setting, press BOTH buttons simultaneously.Then when the setting flashes, use the Set (top) and C/F (bottom) buttons to change the value.Once you have it set, press both buttons or simply wait 3 seconds and the unit will save any changes and return to normal operation.Anytime you have not pressed a button for 3 seconds, the unit will save any setting changes return to normal operationIf you want to turn the unit off (no operation or display), press and hold C/F for 3 seconds.Parameters:P0: C (C or H, cooling or Heating. Default is cooling)P1: 3.6 (Hysteresis (Return difference) Degrees - difference in temperature to enable/disable the relay)P2: 230 (Upper limit degrees)P3: -58 (Lower Limit degrees)P4: 0.0 (Temperature Offset Correction (Calibration) Degrees)P5: 0 (Trigger Delay Start in minutes)P6: OFF (High Temperature Alarm Degrees)P7: FH (FH or CH) Celsius / Fahrenheit (this can also be done by pressing the C/F button)P8: OFF (Set to On to do a factory reset on all settings)My temp lead was 1 meterThe unit comes with protective film on BOTH the front screen, and the inner readout screens (1 on each of the readout screens) - See picture showing all parts disassembled to see the film being described.To remove these, simply bend out GENTLY on the middle tab on either side, and start to slide out the module on that side. - See picture of side of unitOnce the module is out of the slot, move to the other side and repeat this process to free that side. Once BOTH sides are out of the slot slightly, pull evenly to remove the module from the housing.You can now remove the protective film from the screens if desired.If you are not comfortable disassembling the unit, just use your fingernail (nothing hard) to scratch the protective film on the main screen, and pull it from the screen being sure to get all of the bits around the edges. You will still have the protecting film on the inside of the display, but it won't affect anything really.3 stars because there are no directions of any sort with the product, and those in the description are insufficient at best. So far my level of frustration with this product is high. No directions, the parameters timeout in 3 seconds instead of 5 like most others. It only has 2 buttons instead of 3 like most others. All in all, I probably would not buy this product again, but would instead get an Inkbird ITC-1000 or a W1209 or similar. I bought this because I wanted something small that could be panel mounted. So far it fits the bill for that. If I discover anything else I like or dislike, I can guarantee I will update this review accordingly. Hope you found this review helpful!
T**B
Works great!
Hook-up connections were supplied with the unit. Had to search online for info on setting parameters. They work great. I set one up as a control for a 120v bulb in the fridge I keep on the back porch. The lamp turns on to create a little heat if it gets close to freezing so by beverages don't freeze and burst. The second one turns on a 12v rope light in a plastic tote. It keeps my sourdough starter and dough at 73degrees when the rest of the house is about 66 at night. I may get more of these if I can figure out where they would come in handy.
Common Questions
Trustpilot
1 day ago
5 days ago
